Well got to this post early today, its a short one but its a good one… So enjoy
STAGE 1: Phase 4 ‘LS1 to LS6 PCV conversion’

Okay this weeks beer of choice is New Belgium Brewing ‘Lips of Faith Series’ ‘Super Cru’. This beer is pretty much a hopped up Fat Tire with double the malt and hops; Add in crisp Asian Pears, which is a Belgian thing to do; and bring it to life with a Saison yeast. With a ABV of 10% it does get the job done
Okay what we are installing today is a LS6 PCV system. You might be asking your self why do we need to change PCV systems. Well the reason we switched to a GM LS6 PCV system was to reduce oil consumption issues associated with the factory LS1PCV system.
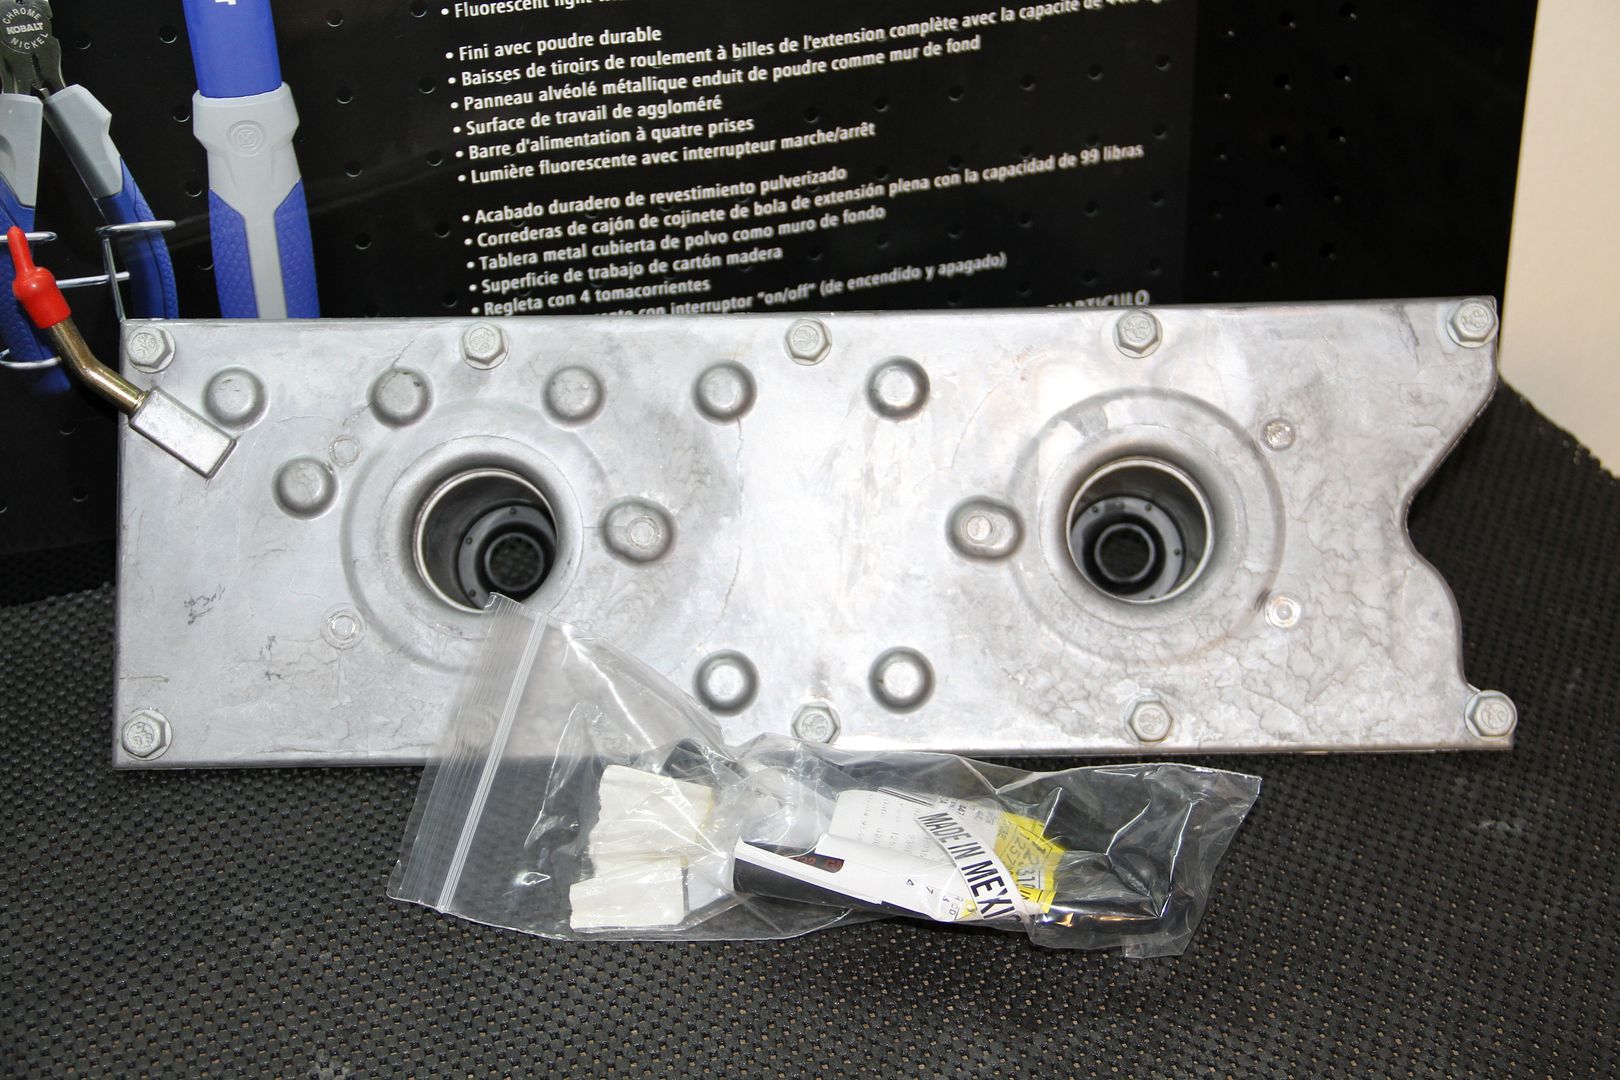
I got the kit from Thunder Racing, it includes everything needed to do the conversion: LS6 Valley Cover, valley cover gasket, valley cover bolts, LS6 PCV Tube, and valve cover plugs.
Thunder Racing LS1 to LS6 PCV Conversion Kit : $169.99
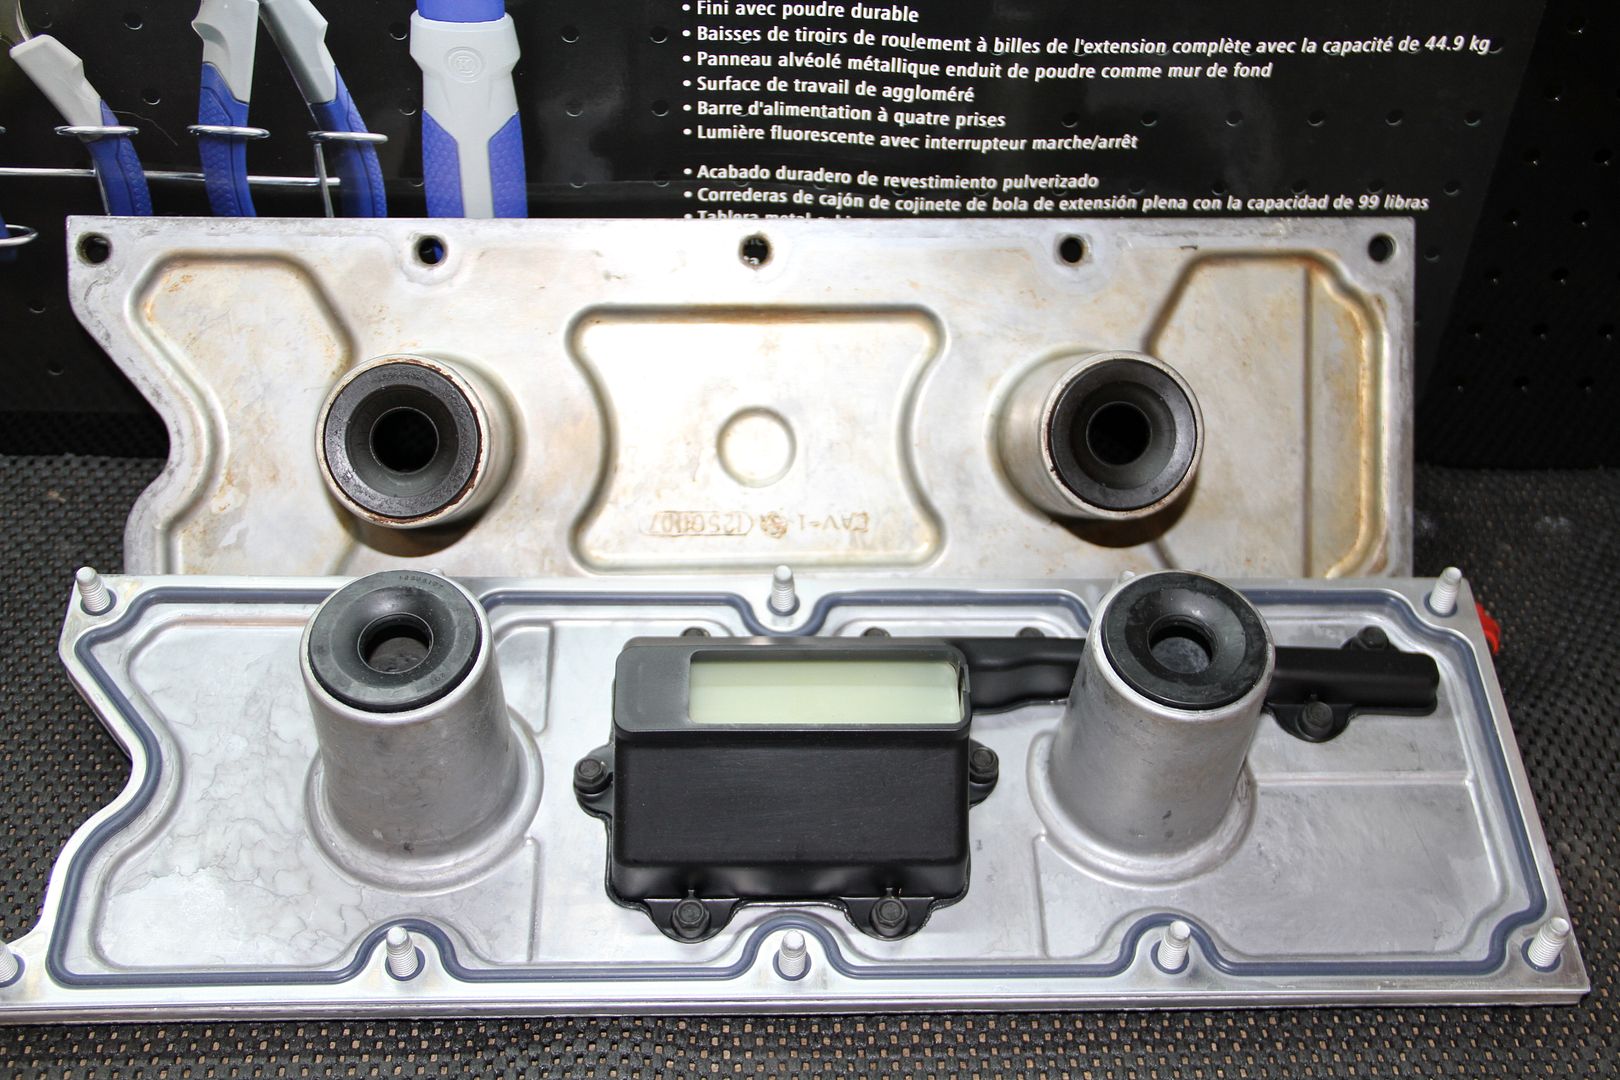
This pic shows the difference in the to PCV systems. Bottom is the LS6 PCV system and the top is the factory LS1 PCV system. You can also see from this pic why some trimming is required.
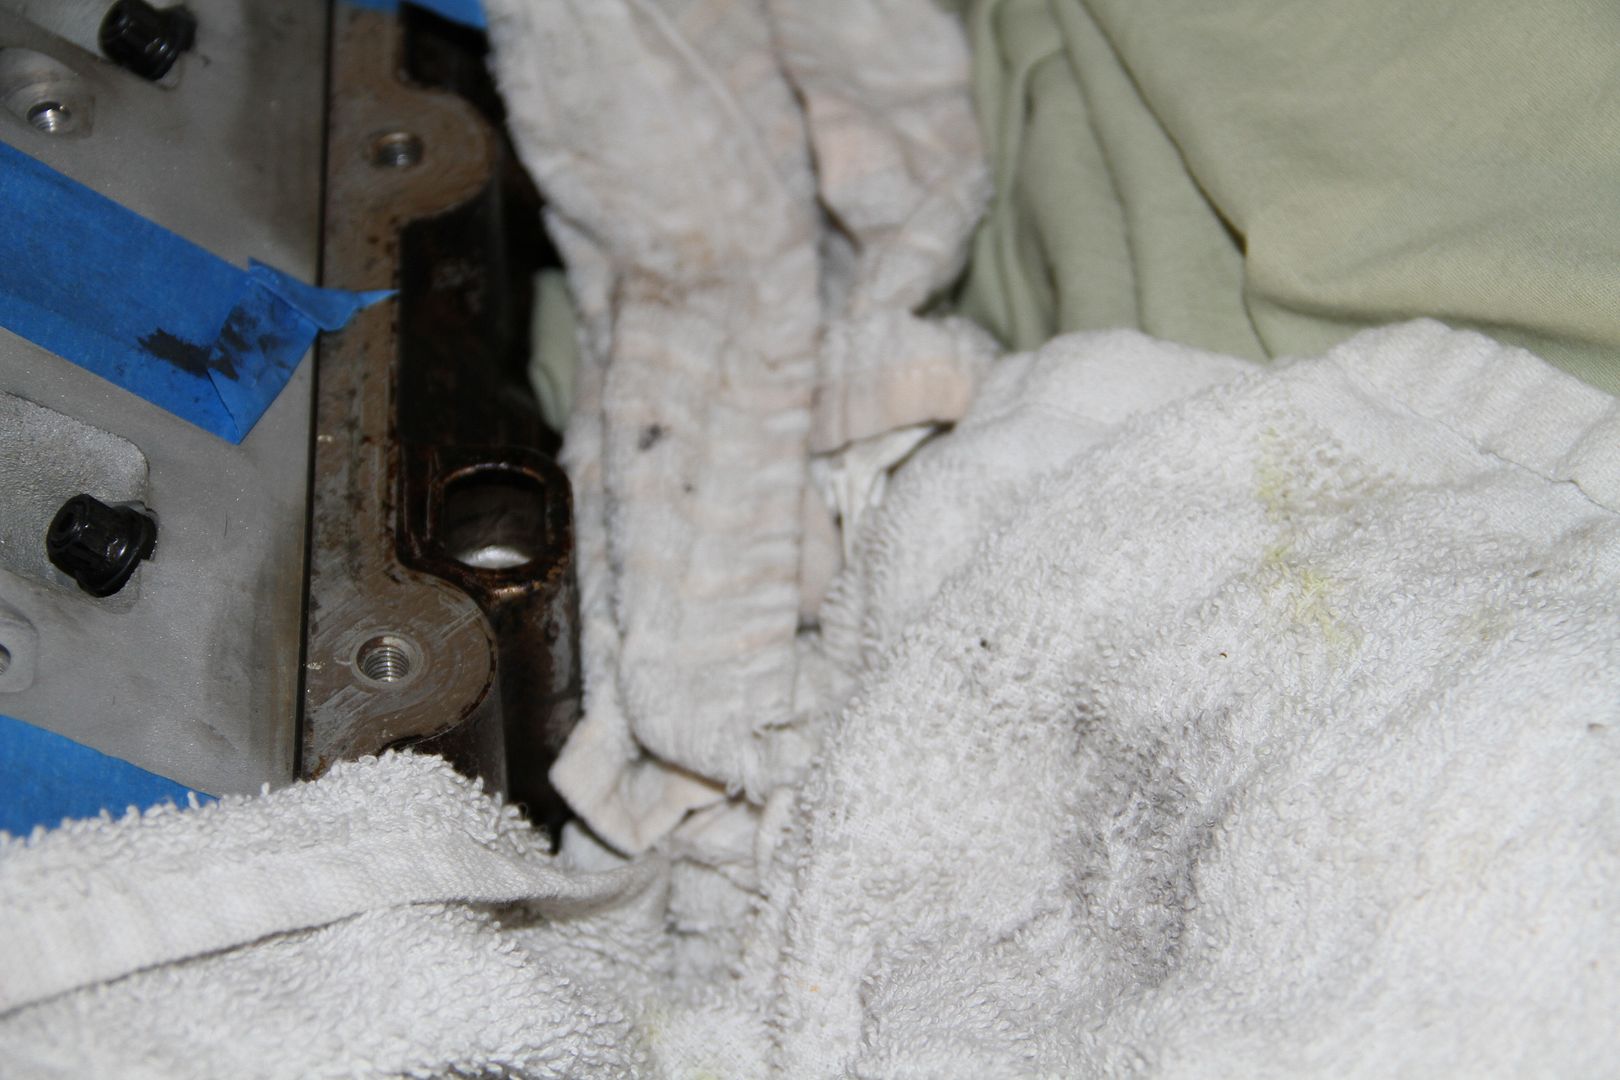
Start of by removing the old LS1 PCV system, I forgot to take pics of this stage, just thought it was straight forward enough. Next prep your area for cutting. Make sure you cover everything you can, use towels, blue painter tape every thing so no shavings get in the engine.

Here is a better pic of the prep area taken from LS1Howto.com
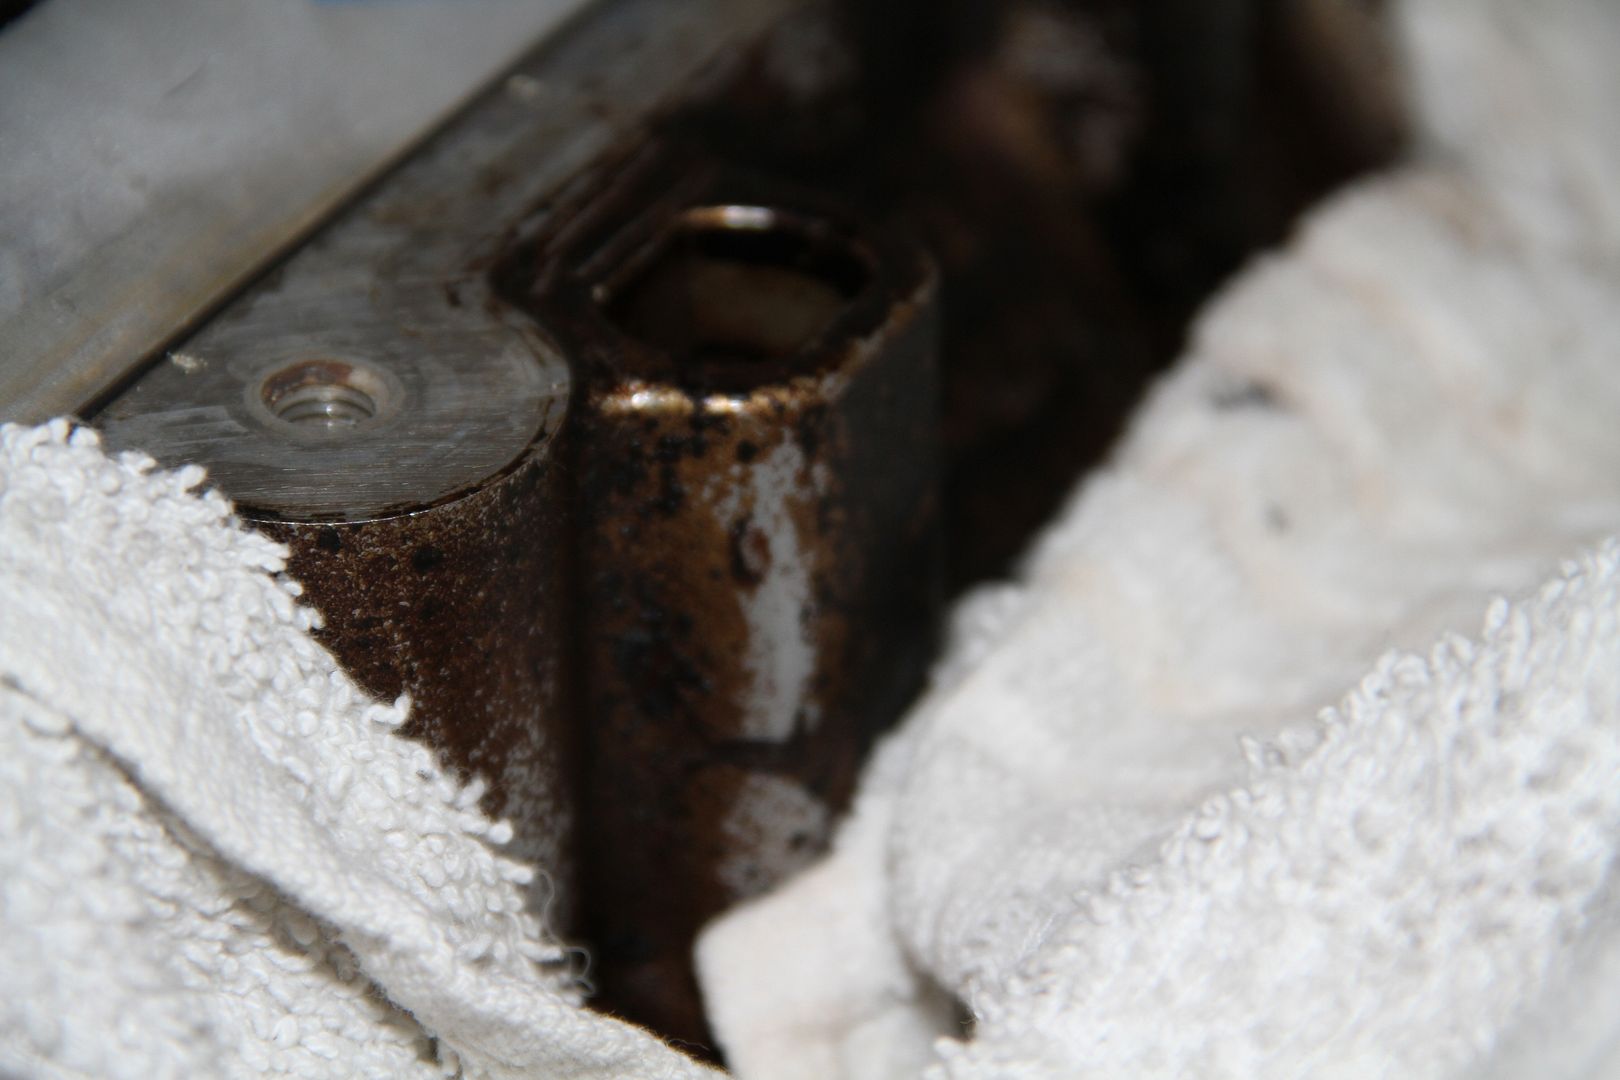
This is the piece that we are going to trim down. We need to chop the wall off this block all the way down so that its even with the bottom of the pit. It may help for you to mark a line on the aluminum about 3/4″ down so you know where to cut

Here is a better pic of the target area, pic taken once again from LS1howto.com
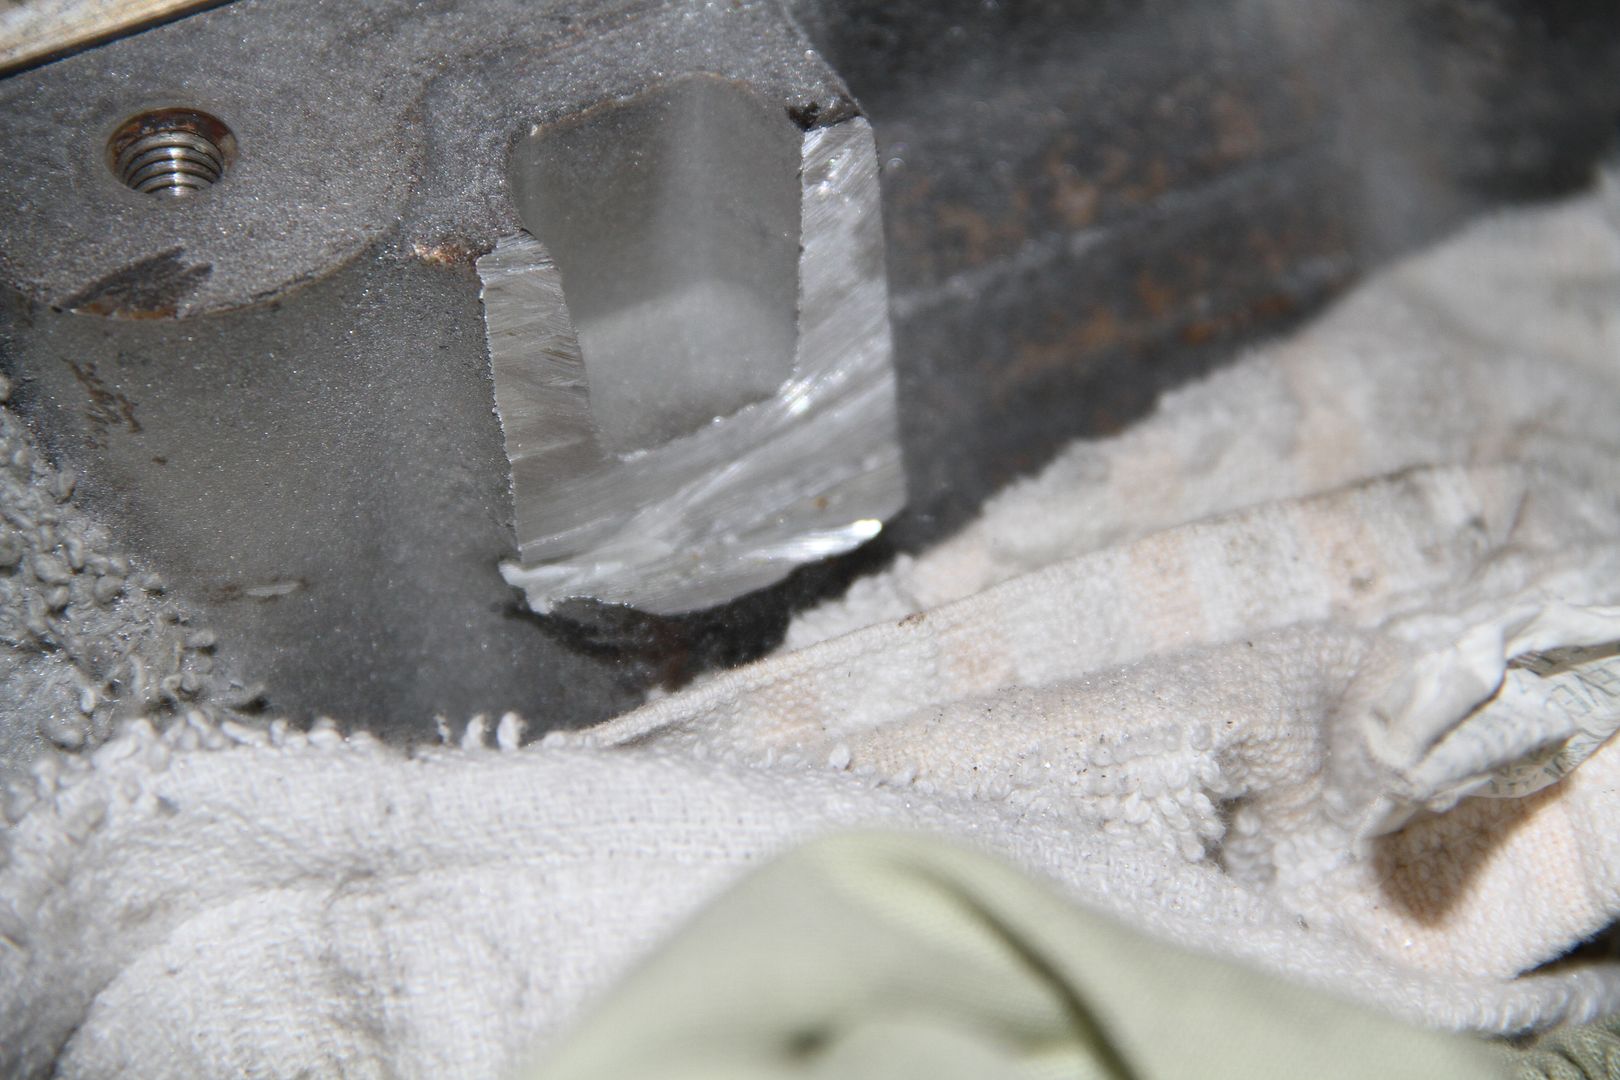
Okay cut made. I just used my high power electric cutting wheel to cut this off.
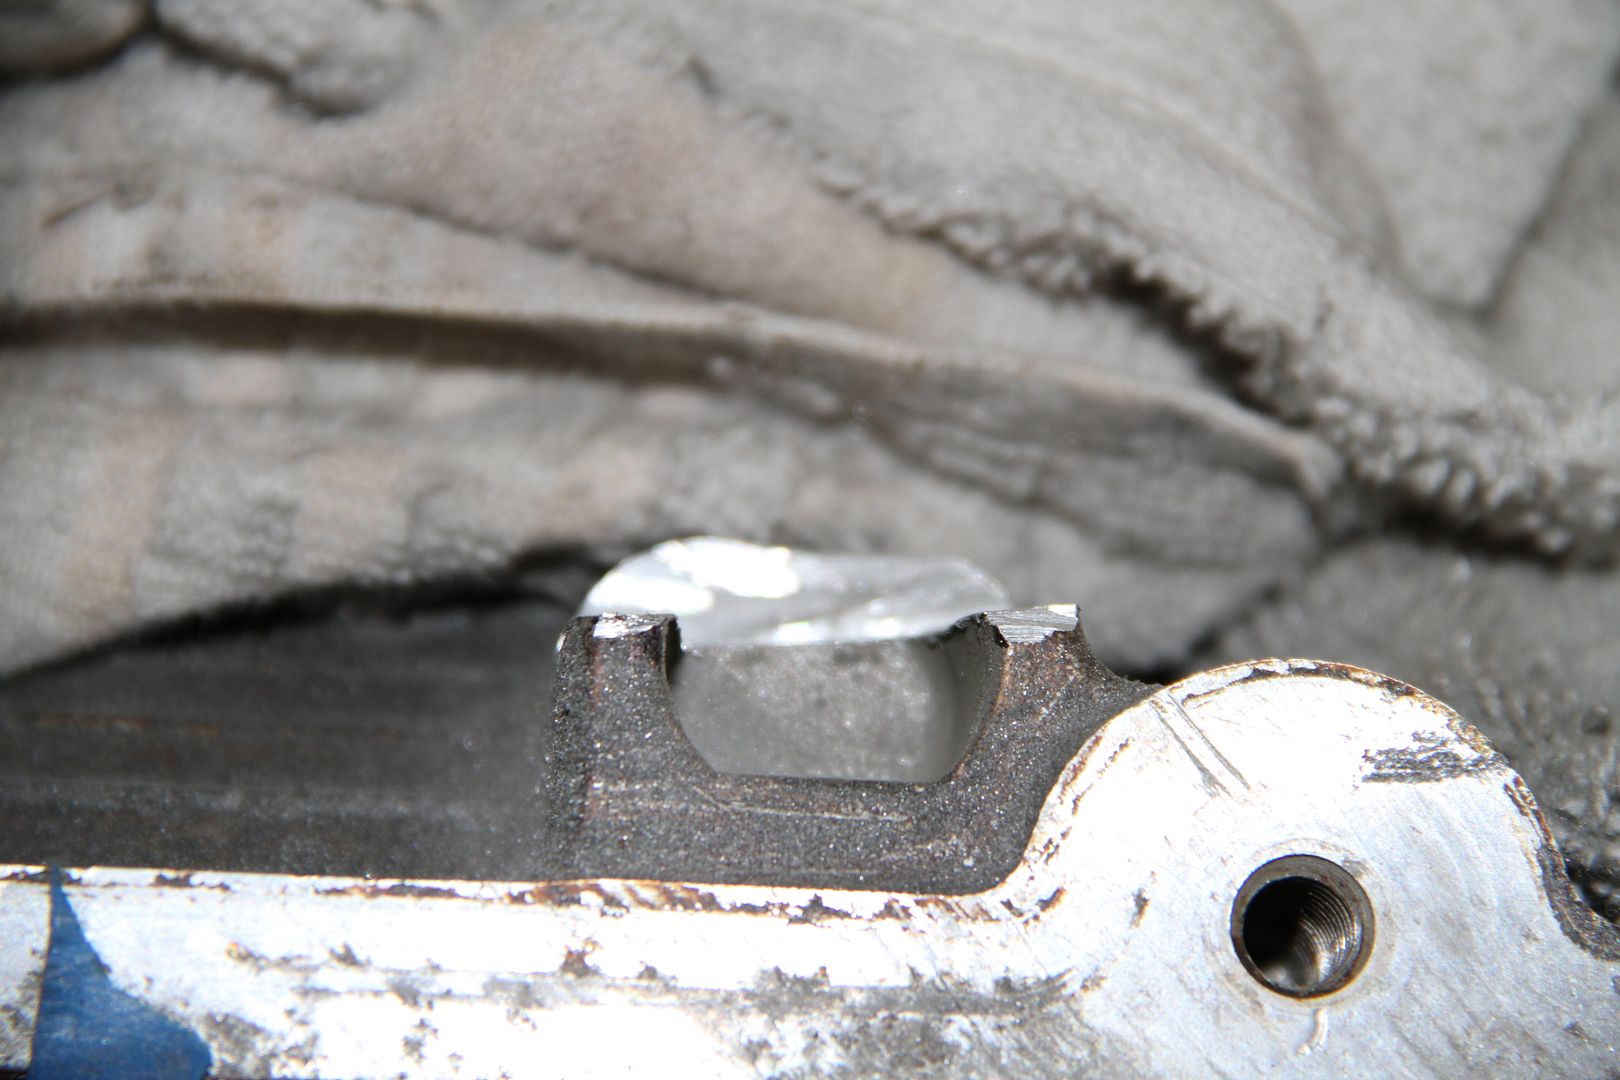
Another pic of the cut
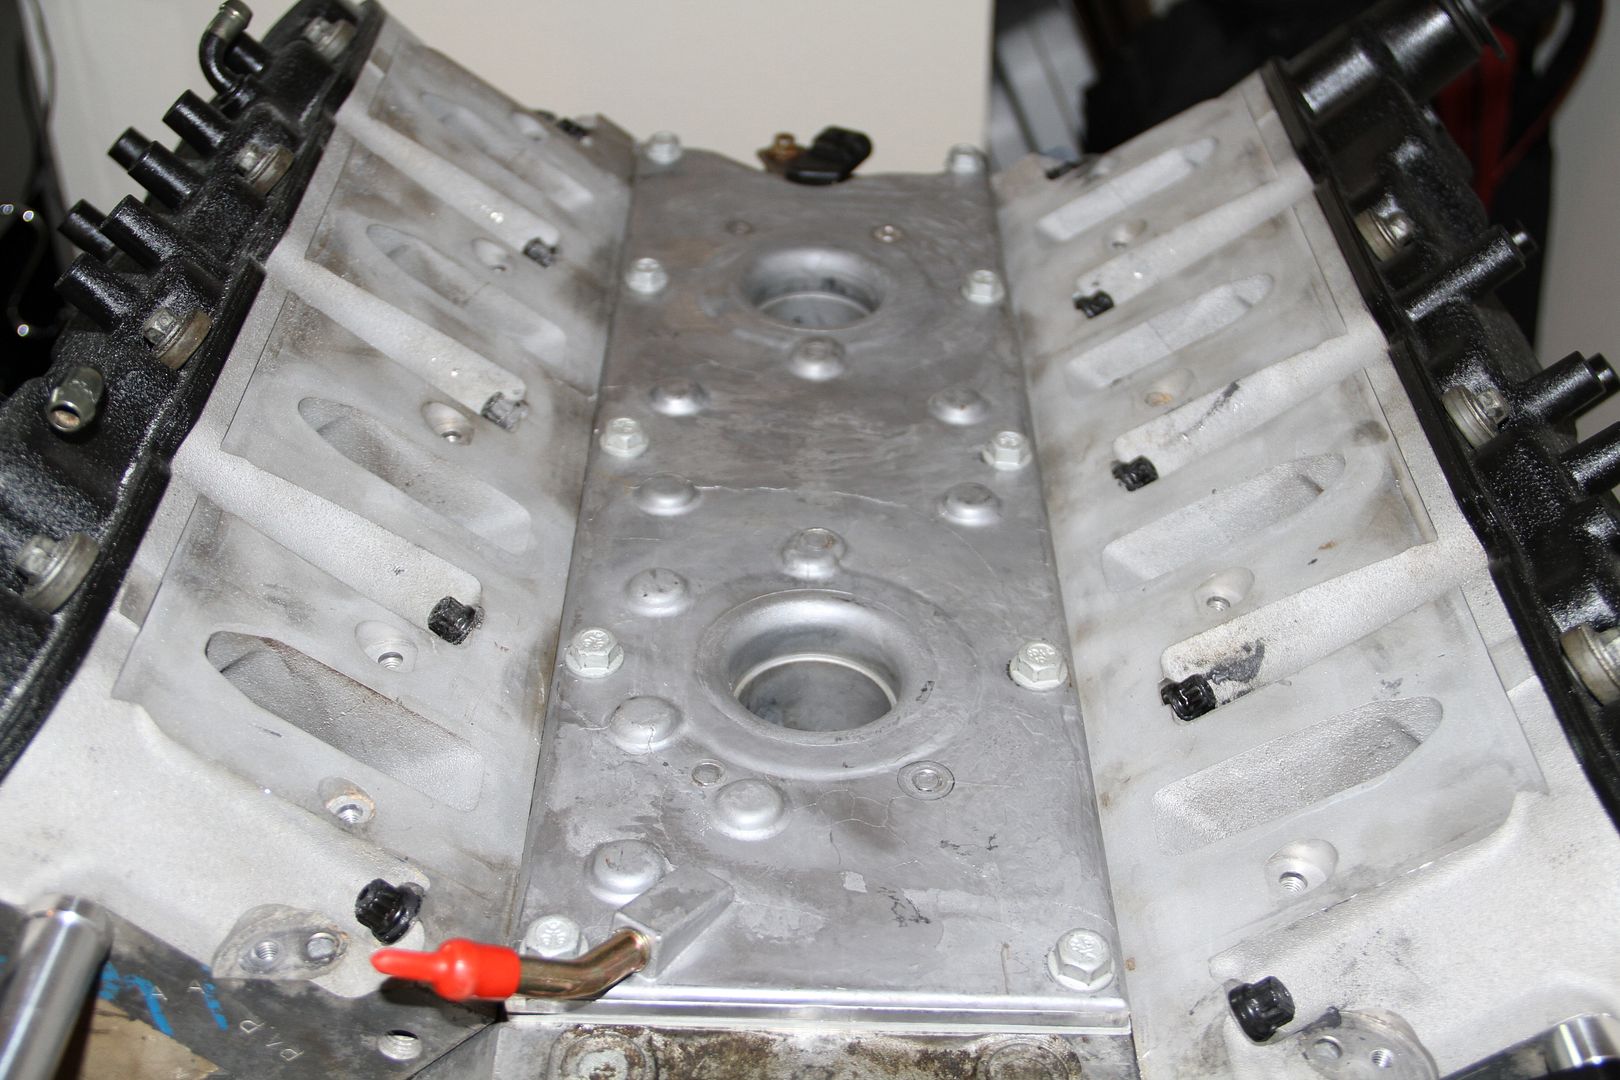
Once you done cutting the piece off make sure you clean the area very well before installing the new LS6 PCV system. The new unit should just drop right into place. Torque all 10 bolts to 18 lb/ft. Next, hand thread in both knock sensors until they bottom out. Torque these to 11 lb/ft. Reconnect both wiring plugs, and slide the plastic connectors back in place.
Now there is more to the install but I have no need for it since I am going to route my PCV system to a Catch can later.
So there you have it nice and quick and easy..
Total price so far: $4,240.19
Next week STAGE 1: Phase 5 ‘FAST 102 Intake/FAST 102 TB’
- Final Fab Work: Exhaust & Intake - 29/07/2013
- 350zLS1 Build Getting Close - 12/05/2013
- It’s All About the Little Things - 02/11/2012
oh man! power coming soon